Get Started with MailerLite Automation.
December 3, 2023 By emailhunk

MailerLite is an excellent email marketing platform that offers free and paid subscription plans. With free offers, you can manage up to 1000 subscribers and send 12000 emails monthly. Paid subscription plans start at $9/month and allow 500 subscribers. You can choose more pricey packages if you have large subscribers on your email list or need to send more emails every month.
The paid subscription packages have advanced features like custom branding and HTML template support to establish your branding to the audience. This quick introduction is enough, but we are here to learn email automation in the MailerLite platform. So, what is email automation, and why should we care about automation?
What is email automation?
Email automation is the process of automating email sending depending on certain conditions. Suppose you have an e-commerce store and want to send an invoice to your customer email when they purchase a product. You can manually send invoices to customers for small orders, but what happens if you have thousands of sales daily? It would be impossible to send and manage campaigns for these types of email campaigns. What is the solution for this type of email?
You might be looking for a solution to automatically send invoices to your customers when they purchase a product. This process is called email automation, automatically sending the right emails to the right audience. However, Malilerlite has a separate platform called Malersend for transactional email. Not only e-commerce but there are many situations when email automation can save time and smoothen the operation.
Suppose you have a free ebook for your audience and only give the download link if they subscribe to your email list. There is no need to email them the download link. With email automation, it will be super easy. In this tutorial, we will demonstrate this process with Mailerlite.
Get familiar with the MailerLite interface.
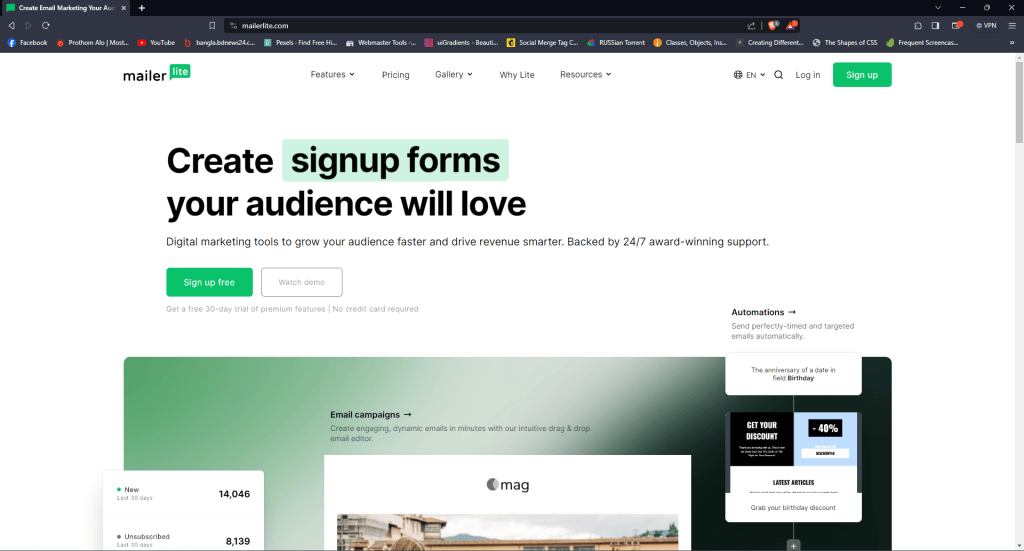
I appreciate the minimalist look of the Mailerlite website. The UI/UX interface is neat and clean. The default home page has some information about what Mailerlite does and its features. Create an account by clicking the Sign Up button. You can choose free or paid options for automating email. In this tutorial, I’ll use a free account. Here is the Mailerlite interface.
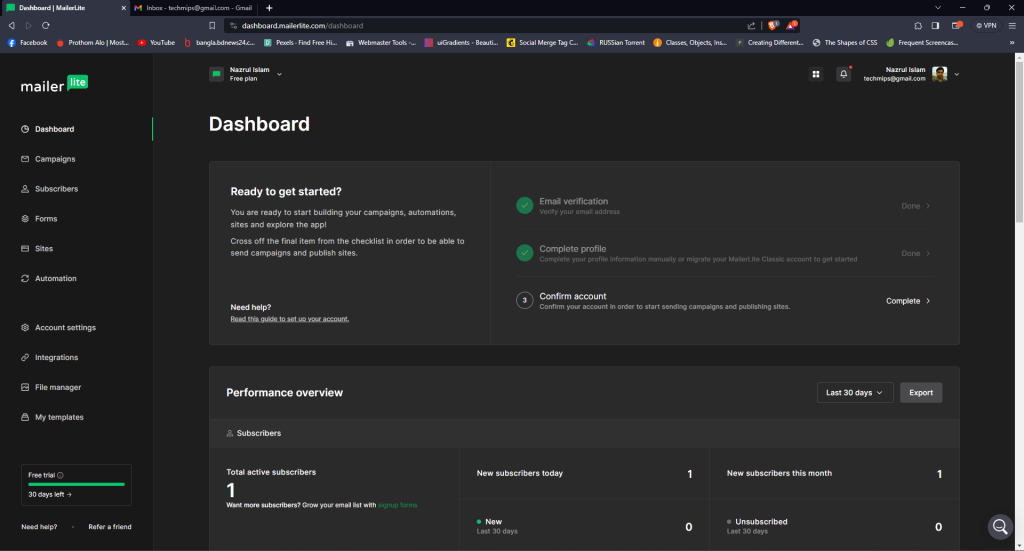
Create a Mailerlite account and verify your email address. I recommended using a business email account of your domain for the Mailerlite account to get approval quickly. There is a high chance of rejection if you use any public email address. Follow the standard procedure to complete the account setup. You’ll land on this dashboard after login, where you can find information about your subscribers, campaign results, and related account settings.
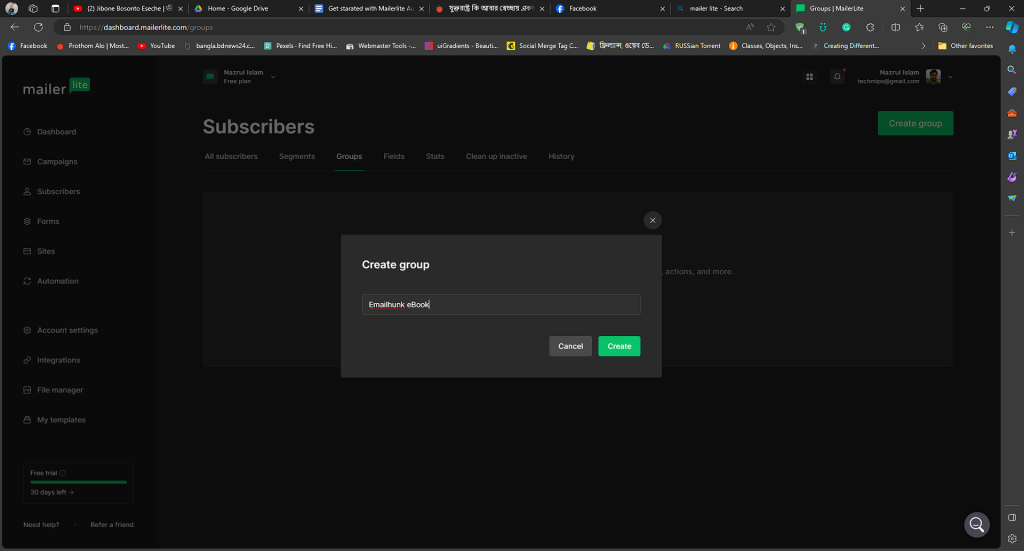
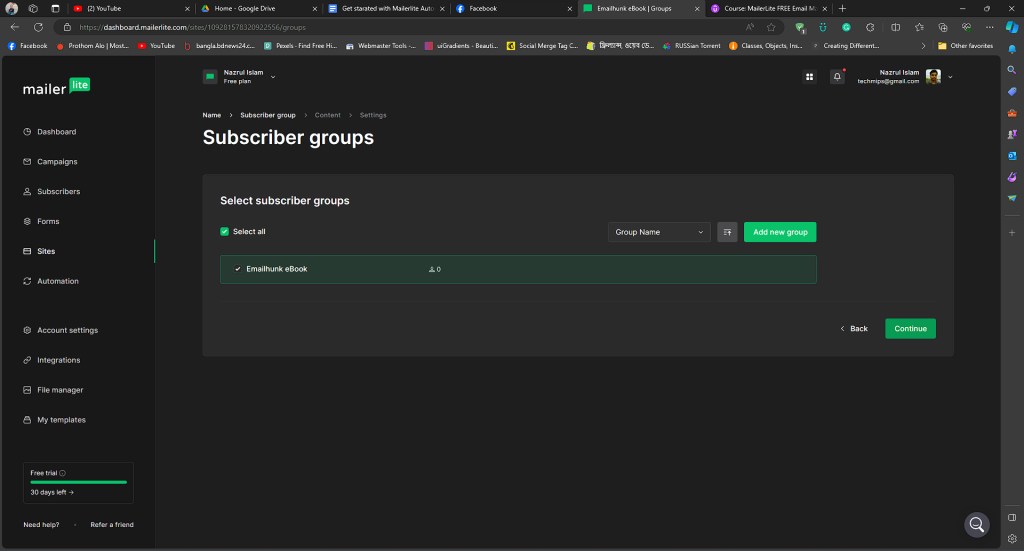
Before creating the landing page, we need to create an email group where we save our email lists coming from the landing page. An email group is nothing more than a container of email lists, allowing you to separate your email subscribers for different purposes.
Creating a landing page in Mailerlite
In this section, we will learn how to create a landing page using MailerLite page builder. This landing page will help us to collect leads. Of course, using a custom landing page is better for professional work. But for a demo, this drag-and-drop page builder will serve fine.
Mailerlite has a large number of prebuilt templates for landing pages and websites. You can choose any of them and customize them as you need. The only drawback is that Mailerlite includes its branding in the footer section on the free plan. Moreover, a custom domain name is only available on paid plans.
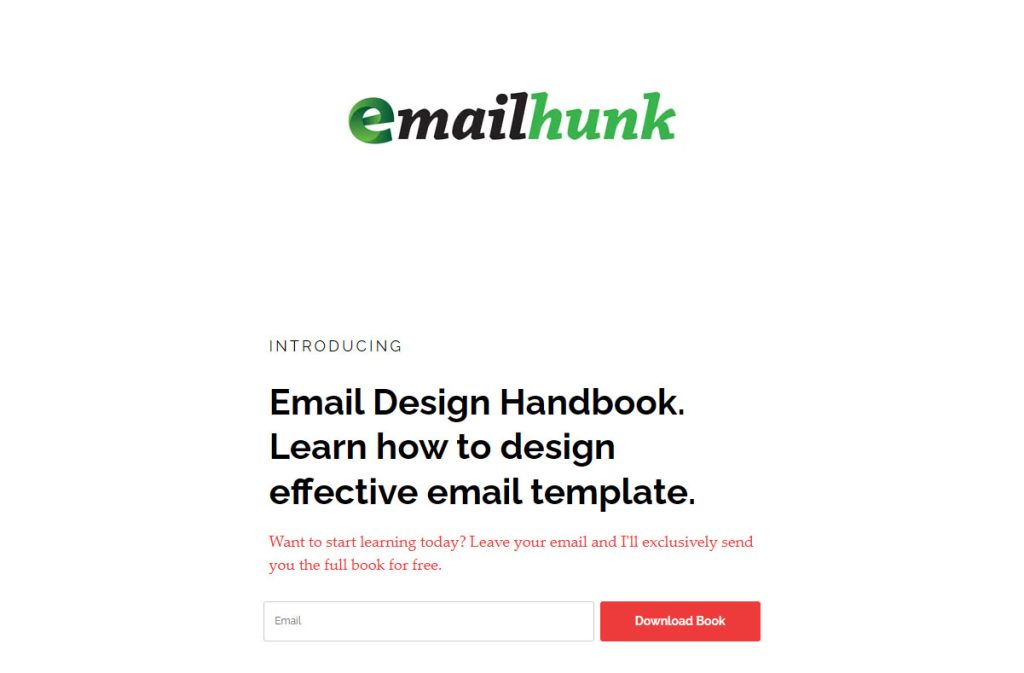
To generate leads, you must offer something valuable in exchange for collecting their email address. People won’t click on your advertisement if there is no good deal on your content. If your offer isn’t good enough, the money used for landing page promotion won’t bring sufficient results. Carefully plan your advertising goal to get an optimal click-thru rate.
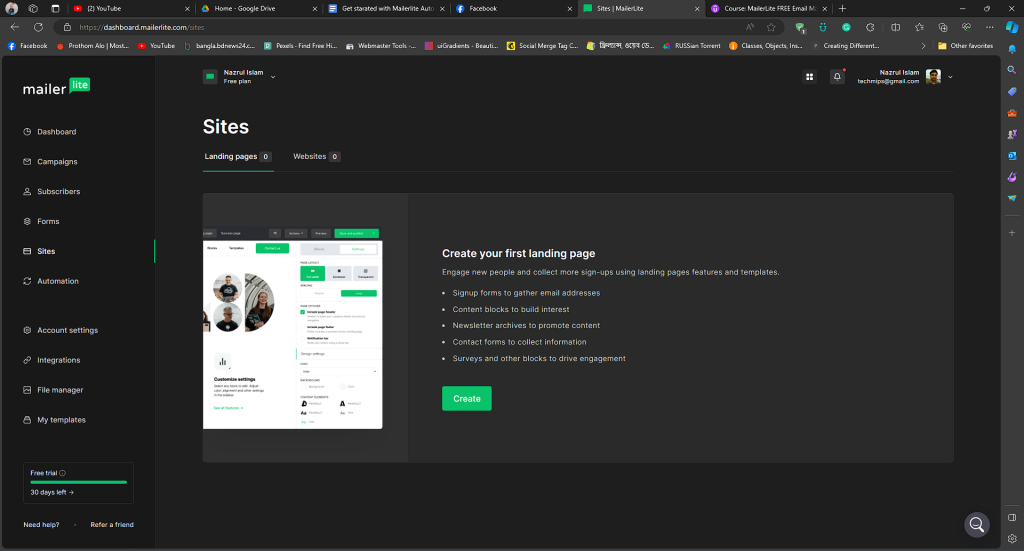
We are promoting a free email marketing book to our audience to get their email address. Log in to your dashboard and click Sites> Landing pages> Create
Choose a template from the landing page gallery and select the email group we created before.
Use the Mailerlite page editor to edit content and upload images and your logo. We create a simple landing page with our logo and promote our free email design ebook.
You can customize the domain name address and SEO settings as a regular landing page. Click the publish page button after editing the content. Your landing page is now live and ready for promotion.
Create Email Automation
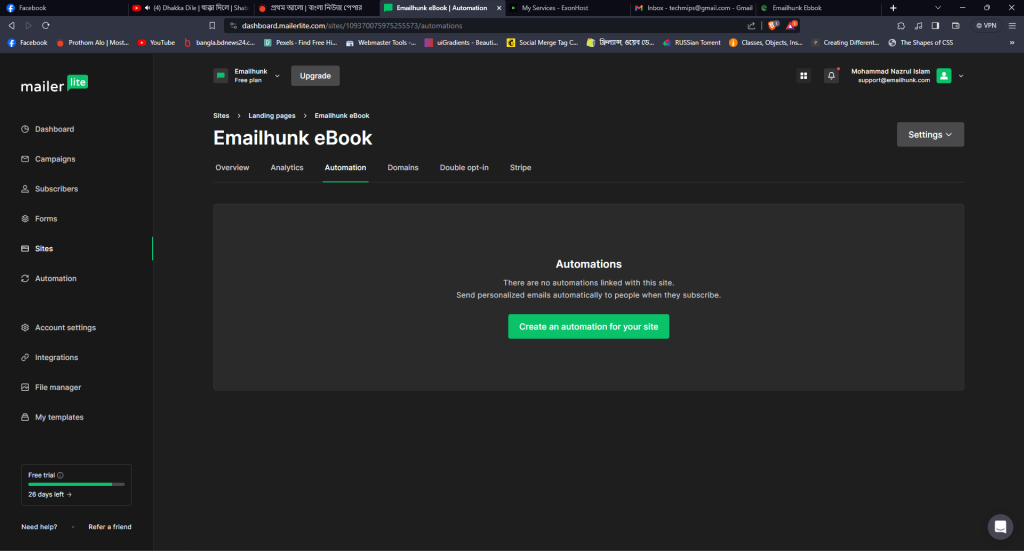
We have created our landing page and now need to set up automation. We can create automation directly from the landing page settings, which is straightforward. Go to your published landing page and click the Automation tab.
Alternatively, we can use the manual automation available in Mailerlite. I’ll show the manual workflow for better understanding.
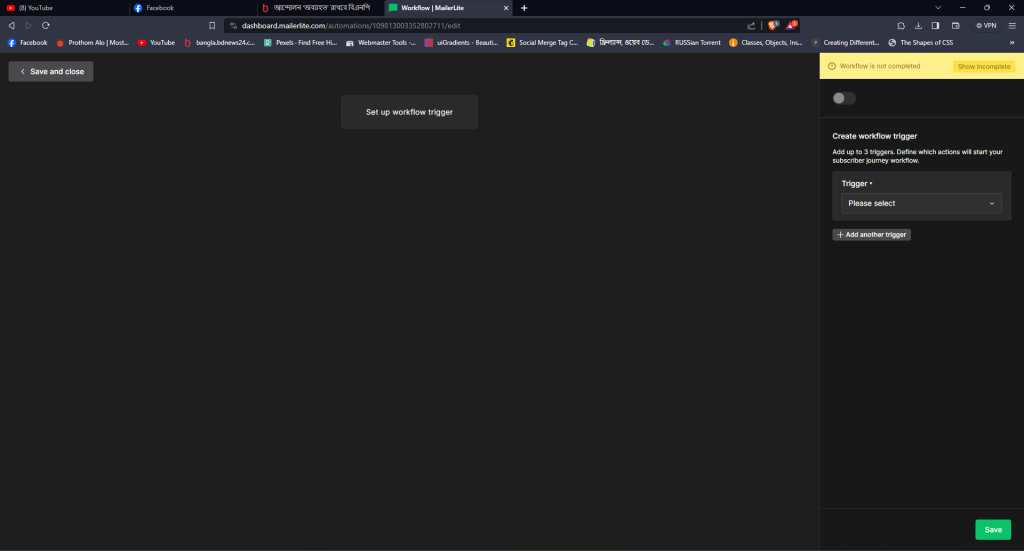
Click Automation> New Automation> Start from scratch.
You can use any premade automation template to save time, but creating from scratch will let you customize the process.
Give a proper name in the automation dialog box. Create a workflow trigger from the right panel and select when the subscriber joins the group. Select your targeted email group from the dropdown list and click save.
We need an action when a new user subscribes to our page. In this case, we will send them an email with download links. Click the + button> select the email button, and give a catchy subject line. Design your email using the Mailerlite editor or use your custom-branded HTML template. You can get your custom-designed template from emailhunk.com.
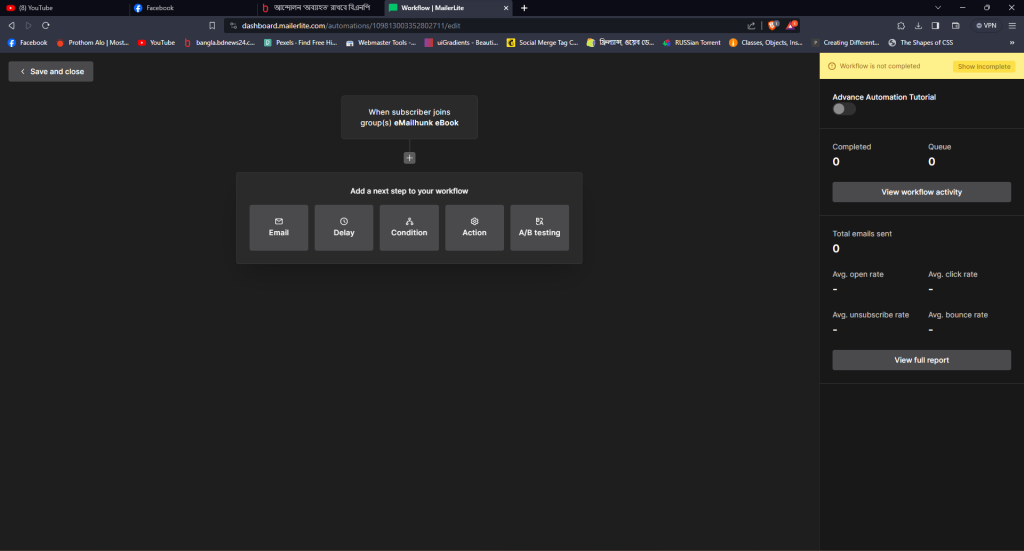
Activate automation using the radio button. You can add more triggers to this flow. Add a delay event to 7 days and set another promotional email if you want to extend automation.
This guide will help to understand basic email automation flow in Mailerlite. Now it’s your turn to muster your skill and test different functions available on the system.

Leave a Comment